15 news to Smartplan
On a daily basis, we receive requests from our customers in terms of how we could develop on the system, and this is something we really appreciate. The last couple of weeks, we have been working on how to turn some of these requests into reality and therefore, we are now ready to present 15 news til Smartplan.
Today, it has become possible to:
- Add roles to several employees at once
- Adjust language to the specific user
- See number of workdays on a employee’s profile
- Add breaks longer than one hour
- Approve all corrections for an employee with just one click
- See raw data in the Excel salary file
- See notes and comments in the regular Excel export
- See location for shift swaps
- Use a search filter in the shift swap history
- Attach files to your messages
- Add absence data to your personal calendar
- See the entire rota in your app
- Hide sickness for other employees
- Hide contact information between employees
- Show or hide locations on the account
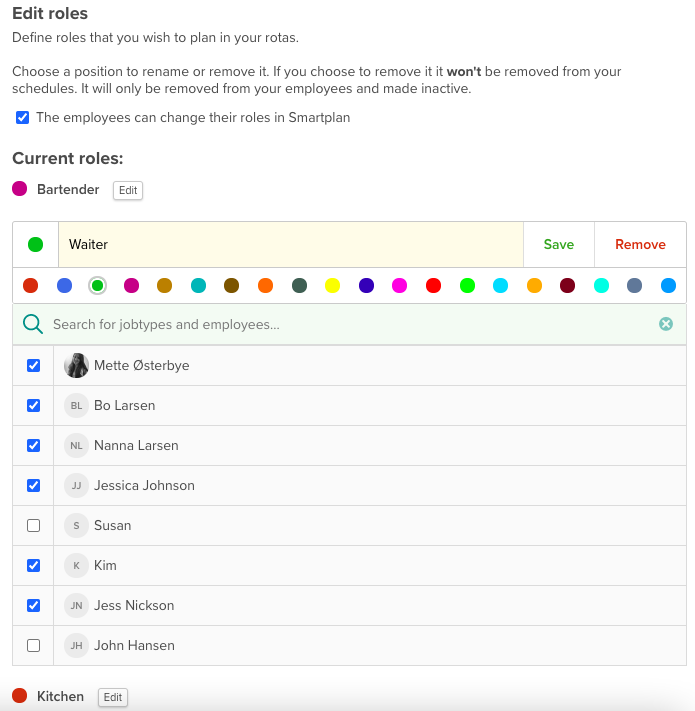
Add roles to several employees at once
Perhaps you have a new worktask in your company which you want to add as a role on your employees’ profiles? With just a few clicks you can easily add the role to all relevant employees instead of having to go through each employee’s profile. Simply go to “Settings” → “Smartplan Settings” → “Roles”. Her you can create a new role and add it to the employees you like. You can also edit an existing role, if you need to add or remove this for several employees.
Adjust language to each user
Each user can now choose which language they want to use Smartplan in. This means, that if you company for example has both English and German employees, you can be sure that each employee understands what is going on in Smartplan. The language can be changed in “Settings”. If an employee does not change language, the general language chosen on the account will be applied.
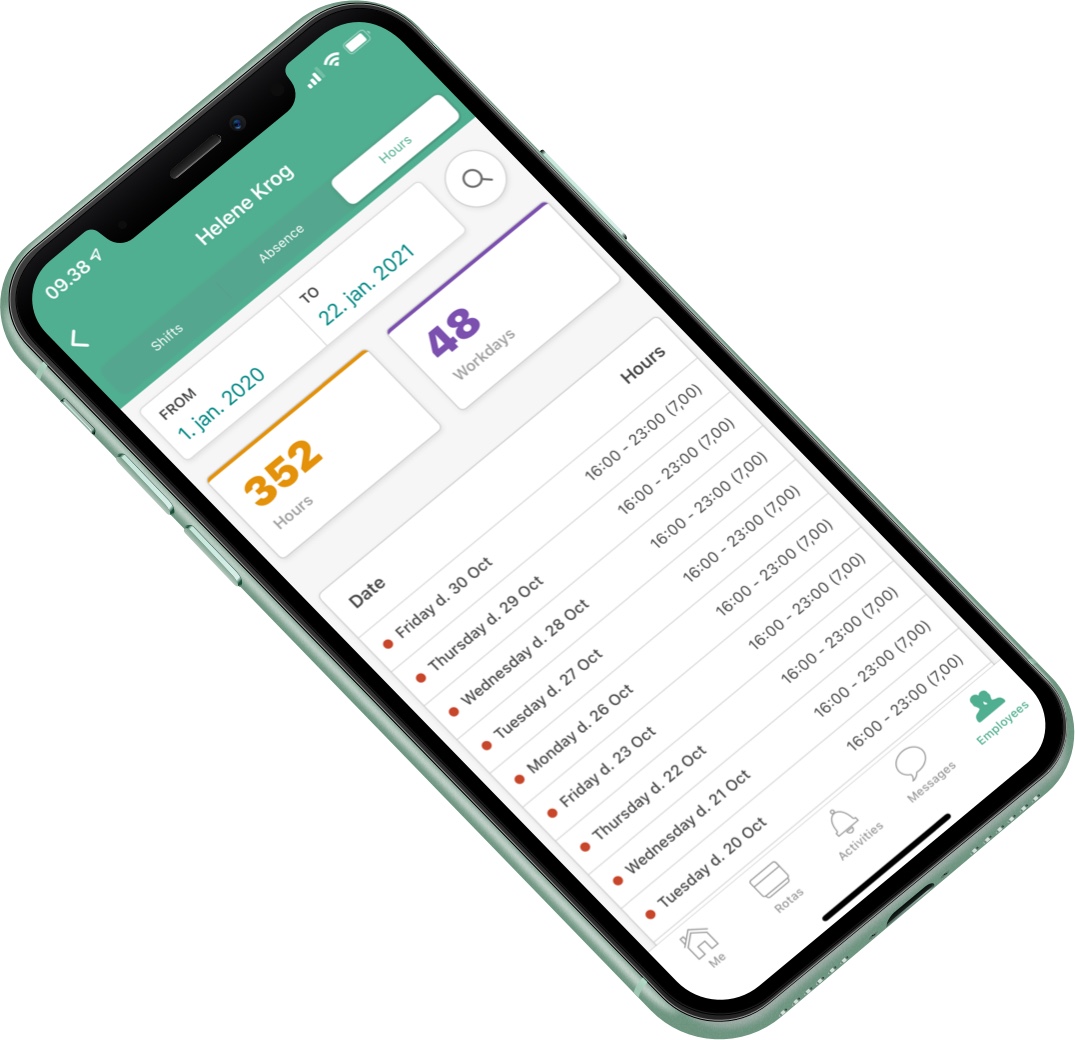
See number of workdays on an employee’s profile
On your employees’ profiles it has only been possible to see how many hours a person has been working. Now, it is also possible to see the number of days an employee has been working. The overview can be found in the employee’s profile under “Hours”. Simply state the period you want to create a look-up for and you will be able to see both the number of worked hours and worked days.
Add breaks longer than one hour
When you add breaks to your employees’ shifts, it has previously only been possible to add up till 60 minutes break per shift. Several of our customers are working with long shifts and therefore, the option of adding longer breaks has been requested. From now on, the following is possible:
- Up till 60 minutes, breaks can be added for 5, 10, 15, 20 etc. minutes.
- From 1 - 2 hours, the breaks will be in 15 minute spans which means that you can add breaks for 75, 90, 105 and 120 minutes.
- From 2 - 4 hours, the breaks will be in 30 minute spans which means that you can add breaks for 150, 180, 210 and 240 minutes.
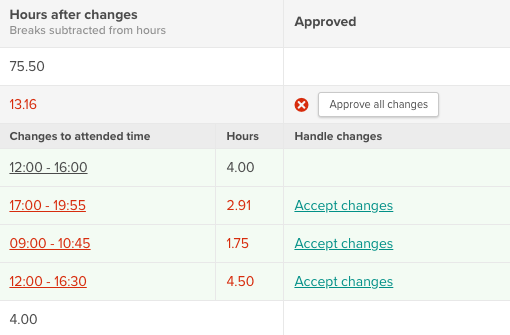
Approve all corrections for an employee with just one click
If your employees are using the punch clock, you might have a lot of corrections you need to go through each month in “Hours & Salary”. Therefore, we have now optimised this process for you.
Simply choose a period for a look-up as you would normally do. Then click on an employee so that you can see shifts for his person. In the column “Approved”, you will be able to click on “Approve all changes” - that is, if the employee has hours that need approval. So you do not have to approve each specific shift anymore.
Raw data in the Excel salary file
If you have purchased Smartplan Plus, you have access to make a Salary file to Excel. In this file, we have added a new sheet with raw data. This means that the formatting we usually have in the salary export to Excel has been removed in this sheet. That should make it easier for you to work with the salary data, you have exported from Excel.
In the already existing sheet, we have also added a row which indicates day of the week. This is of course also included in the sheet with raw data.
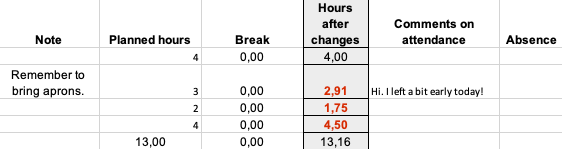
See notes and comments in the regular Excel export
In the regular Excel export which you can get from “Export to Excel” within “Hours & Salary” we have added more information. The new information has been added to the sheet “Person overview”. You will be able to see notes added by an administrator to employees’ shifts, and comments added by employees’ to their attendance. These might have been added when the employee punched out or if they have corrected attendance after having worked.
Notes and comments in the Excel file will hopefully make it easier for you to get an overview of your employees’ hours.
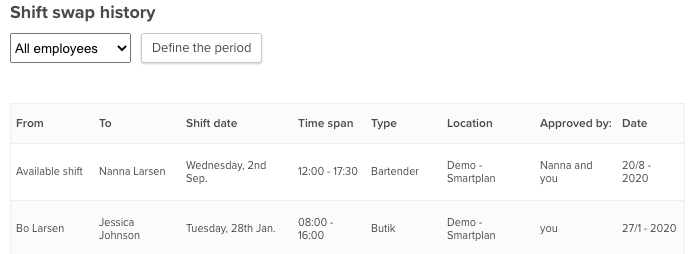
See location for shift swaps
If you have several locations on your account, it might be difficult to know which locations the shifts are from when your employees are requesting shift swaps. Therefore, we have now added locations to the requests which means that you will be able to see:
- Persons involved in the shift swap
- Date and time for the shift
- Which role the shift has
- Location for the shift
Search filter in the shift swap history
We have made it even easier for you to get an overview of your employees’ shift swaps. This history can be found in “Settings” → “Smartplan Settings” → “Shift swap”. In the top of the history, you will be able to choose either an employee or a date you want to search for. This way, it should be quick and easy for you to find the exact shift swap you are looking for.
Attach files to your messages
As an update to our message system, we have added the option of attaching files to your messages. So hopefully, it will be easier for you to keep track of your daily work in Smartplan. Perhaps you need to attach a picture, Excel document, summary from a meeting or something else? Simply click on the paper click-icon when writing a new message.
Add absence data to your own personal calendar
You can now get an overview of the absence from your account directly in your calendar. In “Absence” you can choose to subscribe on the absence. The button can be found next to “Add absence”. This way you add absence to your own personal calendar - exactly like you can subscribe to your own shifts or an entire location.
Since you can only subscribe on absence through the absence calendar, only administrators have this option.
See the entire rota in your app
In the app, you will hopefully experience that it is easier for you to get an overview of the entire rota instead of only specific weeks. On the computer, you have always had the “See all of the schedule” option, and this option has now also been added to the app. When you have opened a schedule in the app, you can click on “See all of the schedule” in the top, left corner. Then you will be able to scroll up and down to see different weeks in your rota.
Hide sickness for other employees
During spring, we gave you the option of choosing whether employees should be able to see each other’s absence. Now, we also have an update for this feature so that you are able to choose, whether employees:
- can see each other’s absence
- can see each other’s absence except from sickness
- can not see each other’s absence
You can adjust these settings in “Settings” → “Smartplan Settings” → “General” under “Privacy settings”.

Administrators will still be able to see all kinds of absence for all users on the account.
Hide contact information between employees
As you might have noticed above, it is not only absence you can hide between employees on the account. You can also choose whether employees should be able to see each other’s contact information or not.
Contact information on administrators will always be visible to employees on the account so that they can reach out to the people responsible for the rota. And administrators will also be able to see employees’ contact information. If you turn this setting on, contact information will therefore only be hidden between regular users on the account.
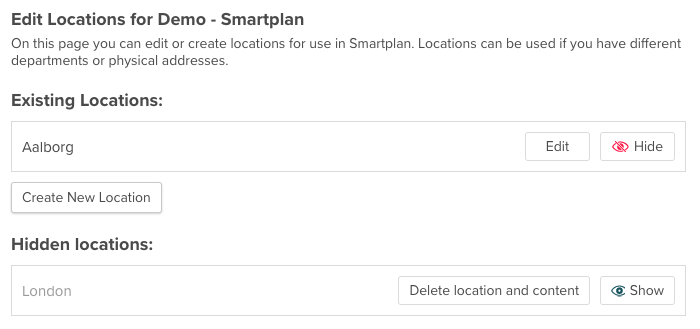
Show or hide locations on the account
The last update is about locations. If you have empty locations you are not currently using, you can choose to hide these on the account. It might be relevant for you if you want to use these locations again in the future or if you want to keep the overview of previous rotas in the archive.
You can add locations in “Rotas” next to an empty location.
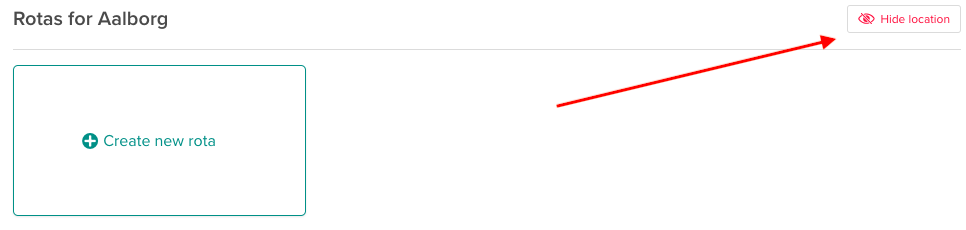
And you can also show or hide locations in “Settings” → “Smartplan Settings” → “Locations”.
If you have any questions at all, feel free to reach out to us on support@trysmartplan.com - we are ready to help you out.
Smartplan is a perfect match for your business
It’s easy to switch
Whether you’re currently using scheduling software, Excel or even a pen and paper, switching to Smartplan is quick and easy.
It just works
Smartplan combines a simple, user-friendly interface and powerful scheduling tools to create a system that just works.
Take care of your bottom line
We’ve ditched unnecessary frills and functions to give you the most cost-effective solution.